A Customer Satisfaction (CSAT) score tells you how satisfied a customer is with a product, service, or experience. It measures how a customer feels about a brand interaction. Use customer satisfaction surveys to ask contacts for feedback on their experiences or interactions with your business. You can send this type of survey through email, or display it on any webpage that has your HubSpot tracking code installed.
- In your HubSpot account, navigate to Service > Customer Feedback.
- Create, clone, or edit a survey:
- To create a new survey, click Create survey in the upper right.
- To clone an existing survey, hover over the survey and click the Actions dropdown menu, then select Clone.
- To edit an existing survey, hover over the survey and Edit.

- Hover over the Customer Satisfaction card and click Create survey.

- Click the pencil icon edit at the top to give your survey a unique name.

Delivery
- Select the delivery of your customer satisfaction survey by clicking Email or Web page.
- Click the Recipients tab to continue.
Recipients
If you're sending your survey by email:
- By default, a survey will send to a contact if they became a customer more than 30 days ago. To change the filter, click Edit enrollment triggers.

- On the Triggers tab, customize the filters by clicking the AND or OR buttons. You can set filters based on any contact, company, deal, and ticket properties.

- By default, contacts who already meet the selected criteria will not receive the survey. To conduct this survey with existing contacts who meet the criteria, click the Options tab, then click to toggle the Enroll existing contacts switch on.
- By default, contacts who have already completed the survey will not receive the survey. To survey with contacts who have already completed the survey, click the Options tab, then click to toggle the Re-enroll contacts switch on.

- In the right panel, the survey recipients will display. You can search through this list using the search bar in the top right.
- Once you're done setting up the filters, click Save in the bottom right.
- To add a delay between the survey email send and when a contact meets the criteria you've set, click the Set a delay tab and select the Add delay checkbox. Click the dropdown menu to select days or hours for the delay and enter a number.

- Click the Customize tab to move on to the next step.
If you're sending your survey by web page:
- Select All visitors to show the survey to all visitors or Specify contacts to show the survey to contacts who meet certain criteria.
- If Specify contacts is selected, the default filter Became a customer is more than 30 days ago will be used. To change the filter, click Edit enrollment triggers.

- In the Triggers tab, customize the filters by clicking the AND or OR buttons. You can set filters based on any contact, company, deal, and ticket properties.
- By default, contacts who already meet the selected criteria will not be sent the survey. To conduct this survey with existing contacts who meet the criteria, click the Options tab, then click to toggle the Enroll existing contacts switch on.
- By default, contacts who have already completed the survey will not be sent the survey again. To survey contacts who have already completed the survey, click the Options tab, then click to toggle the Re-enroll contacts switch on.
- In the right panel, the recipients of the survey will display. You can search through this list using the search bar in the top right.
- Once you're done setting up the filters, in the bottom right, click Save.
Please note: the web page survey will only show for contacts who are tracked by the cookies in their browser.
Display (Web page surveys only)
- Select a location for your web page survey: Slide-in box left, Slide-in box right, or Dropdown banner. The right panel will show a preview for each option.
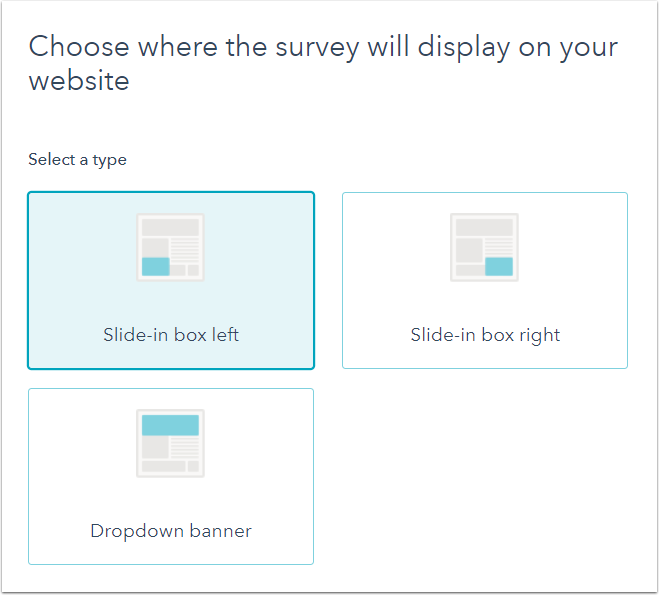
- Click the Customize tab to continue.
Customize
For email surveys:
- Set the name and address that your survey will be sent from. You can select the name and address of any user in your account.

- Click the Survey language dropdown menu and select which language you want the survey to be in.
- Enter a Subject line, Greeting, Introduction and Question for your survey email. In the Subject line and Greeting fields, click contacts Contact token to include a personalization token.
- To upload an image for the email survey, click to toggle the Featured image switch on.
- Select one of the default color options, or set a custom color by entering a hex color value or clicking the color picker to the right.

- In the right panel, preview how the question looks and click the Follow-up tab to continue.
For web page surveys:
- Click the Survey language dropdown menu and select which language you want the survey to be in.
- Customize the Question in your survey.
- Select one of the default color options, or set a custom color by entering a hex value or clicking the color picker to the right.

- In the right panel, preview how the question looks and click the Follow-up tab to continue.
Follow-up
Customize your follow-up questions to learn more about the customer's response:
- Click Unhappy to enter a Follow-up question for customers who were unhappy with their experience.
- Click Neutral to enter a Follow-up question for customers who felt neutral about their experience.
- Click Happy to enter a Follow-up question for customers who were happy with their experience.

- Click the Thank you tab to move on to the next step.
Thank you
Customize the thank you message a customer will see after submitting a survey response.
- To include a default illustration at the top of your thank you message, click to toggle the Show illustration switch on.
- Customize the thank you message for your visitors depending on their survey response:
- Click the Unhappy, Neutral, and Happy tabs, then enter a thank you message in the Header text and Body text fields.

- In the right panel, preview the thank you messages, and click the Options tab to move to the next step.
Options
For email surveys:
- Click the Choose an individual user or a team dropdown menu to select users and teams who will receive email notifications when a customer submits a customer satisfaction survey.

- Click the Summary tab to continue.
For web page surveys:
- Under Specify which website pages the survey should appear on, select whether to show your survey on All pages or Only pages that match these URLs. If you select Only pages that match these URLs, enter a URL or search for an existing page by name. To add multiple pages, click Add another page. Click the trash icon delete on the right of a URL to remove the survey from it.
- Under When do you want the survey to appear? enter the number of seconds before the survey is shown to a visitor.
- To enable the survey for mobile devices, click the Show survey on small screen sizes checkbox.
- To select users and/or teams to receive survey response notifications, click the Add users who should get an email notification dropdown menu and select a user or team.

- Click the Automation tab to continue.
Automation
- To set up follow-up actions based on survey responses, click Create workflow in the Unhappy, Neutral, and/or Happy sections.
- In the right panel, select the actions to automate or click See more to see other actions. Learn about using workflows actions.

Please note: customer satisfaction survey workflows will not appear in the workflows tool (Automation > Workflows). They can only be edited from this tab of the survey setup.
- Click the Summary tab to continue.
Summary
Review the settings and ensure that you've set everything up properly.
- To preview how your survey will appear on desktop, tablet, and mobile, click the Actions dropdown menu in the top right, and click Preview.
- To send yourself a version of an email survey or view the survey on a test web page, click the Actions dropdown menu in the top right and click Test.
- When you're done, click Publish in the upper right to take your survey live.